Quantcast
Channel: Citrix – blog – Alexander Ollischer | Citrix | Microsoft
Viewing all 32 articles
Browse latest View live

Citrix StoreFront v3.0 MMC crashes with error – MMC has detected an error in a snap-in and will unload it

$
0
0

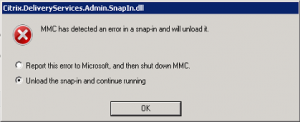
When clicking Deploy Citrix Receiver in the Citrix StoreFront v3.0 MMC it crashed immediately and I received an error stating: MMC has detected an error in a snap-in and will unload it:

mmc_1

Check your Event Log’s Application Log for accompanying Event IDs 1026 and 1000:

mmc_2 mmc_3

I searched the Internet for this quite generic .NET Framework error and came up with EventID.net:

Since this event can be recorded for a wide variety of applications and theirs specific problems, there are several details recorded in this event that have to be considered before following various suggestions found on support forum:

1. The application name (the application that crashed) – MSHelpListener.exe for the example above
2. The .Net Framework version – i.e. v4.0.21006
3. The cause of the crash. For example, “the process was terminated due to an unhandled exception” means that while running, the application encountered a problem that was not programmed to handle properly (an “exception”).
4. The exception itself: System.Net.HttpListenerException in this case, an error that occurs while processing an HTTP request.
5. The stack (where in the program did that happen).

Since this is a problem with the application itself, unless you are the programmer, you cannot change it. So, what can be done is to try to install the latest version for that application or any hotfixes or contact the developer. In certain situations, understanding the reason of the failure (the “exception”) may help in identifying the nature of the problem and maybe determine ways to avoid it. For example, the System.Net.HttpListenerException, related to a problem with an HTTP request may be caused by a network connection issue or maybe by the local TCP/IP configuration. Other exceptions may point to a permissions problem, lack of space, etc.

Didn’t help pretty much so I was wondering: what causes the MMC crash in the first place? The crash appeared only when clicking Deploy Citrix Receiver and as the MMC configures/changes the underlying Store’s configuration files, e.g. web.config for the Receiver for Web node, I started looking there.

Note: the web.config file can be found in C:\inetpub\wwwroot\Citrix\<ReceiverForWebSiteNameWeb>, e.g. C:\inetpub\wwwroot\Citrix\DemoWeb

For StoreFront v3.0 the different HTML5 Deployment modes are encoded by the following tags within the pluginAssistant group element in web.config file:

  • <html5 enabled=”Off” = Install locally
  • <html5 enabled=”Fallback” = Use Receiver for HTML5 if local install fails
  • <html5 enabled=”Always” = Always use Receiver for HTML5

html5_6

Simply search for html5 and verify being within the pluginAssistant group element, representing Deploy Citrix Receiver in the StoreFront MMC:

web_config_1

The pluginAssistant group element should be similar to this example:

<pluginAssistant enabled=”true” upgradeAtLogin=”false”>
<win32 path=”http://downloadplugins.citrix.com/Windows/CitrixReceiverWeb.exe” />
<macOS path=”http://downloadplugins.citrix.com/Mac/CitrixReceiverWeb.dmg”
minimumSupportedOSVersion=”10.6″ />
<html5 enabled=”Fallback” platforms=”Firefox;Chrome;Version/([6-9]|\d\d).*Safari;MSIE \d\d;Trident/([6-9]|\d\d);Android;iPad;iPhone;iPod;”
launchURL=”clients/HTML5Client/src/SessionWindow.html” preferences=””
singleTabLaunch=”false” chromeAppOrigins=”chrome-extension://haiffjcadagjlijoggckpgfnoeiflnem”
chromeAppPreferences=”” />
<protocolHandler enabled=”true” platforms=”(Macintosh|Windows NT).*Chrome/((4[2-9]|[56789][0-9])|\d\d\d)(?!.*Edge)”
skipDoubleHopCheckWhenDisabled=”false” />
</pluginAssistant>

Upon checking the web.config file I realized the html5 tag being different for the affected Receiver for Web site, i.e. <html5 enabled=”on” in my case, and the whole pluginAssistant group being a little bit bogus:

html5_7

I then tried to simply copy the whole groupAssistant group from a correctly formatted web.config file and pasting it into my seemingly corrupt web.config file and saving it. After that I restarted my StoreFront MMC and clicked Deploy Citrix Receiver once more – et voilá – it worked!

html5_3

Now I was once more able to adjust the Deploy Citrix Receiver settings in the StoreFront MMC. I guess something went wrong during my upgrade from StoreFront v2.6 to StoreFront v3.0 that messed with the web.config file.


StoreFront v3.0 and new Unified Receiver Experience – First Impressions (Part 3)

$
0
0

StoreFront v3.0 and new Unified Receiver Experience – First Impressions (Part 3)

I was mostly interested in the new customization options and how to switch from the previous Green Bubble UI (a.k.a. the Classic Receiver Experience) to the new Unified Receiver Experience. So I’d like to start a little blog series about my first steps with StoreFront v3.0, covering:

  1. Upgrading to StoreFront v3.0 and enabling the new Unified Receiver Experience
  2. Customizing the Receiver for Web Unified Experience
  3. Evaluating the Google Chrome Support

With Receiver for HTML5 you get the full Citrix experience with Chrome devices. The following features have been added in the latest version v1.7:

  • Pure Socket Connection
  • Session Reliability
  • File Transfer
  • Access to Google Drive
  • Single App Kiosk Mode
  • New Receiver UI

Note: when connecting with Receiver for HTML5 v1.7 you still need a NetScaler Gateway. Without a NetScaler Gateway you cannot utilize Receiver for HTML5. Requirements can be found here. For a PoC of Receiver for HTML5 without NetScaler Gateway by directly connecting to StoreFront v3.0 read this blog article (coming soon).

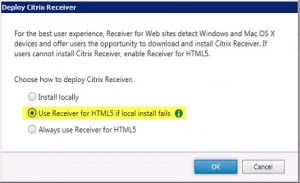
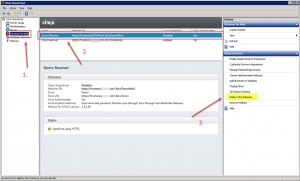
Enable HTML5 Support for Receiver for Web for the corresponding site by clicking Deploy Citrix Receiver:

html5_4

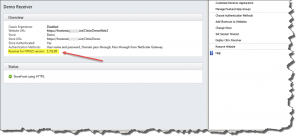
You can verify the installed Receiver for HTML5 version in the center pane for the selected Receiver for Web site:

html5_5

Enable Use Receiver for HTML5 if local install fails:

html5_3

Note: in case your MMC crashes as soon as you click Deploy Citrix Receiver and you receive the following error:

mmc_1

Read the following blog article to solve the issue: Citrix StoreFront v3.0 MMC crashes with error – MMC has detected an error in a snap-in and will unload it

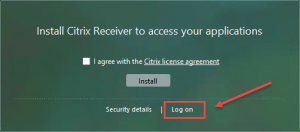
After having enabled Receiver for HTML5 login to your NetScaler Gateway and do not install the Citrix Receiver plugin during logon. Simply click Log On and bypass the Citrix Receiver installation through StoreFront:

html5_8

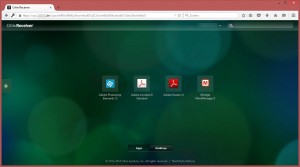
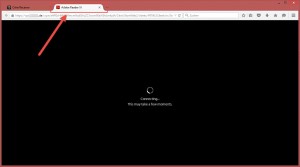
Then launch any Published Application available and verify whether the session will be launched in a separate browser tab using Receiver for HTML5:

html5_9 html5_10

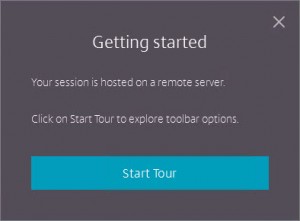
When using Receiver for HTML5 for the first time you’ll be greeted by the Getting Started wizard:

wizard_1

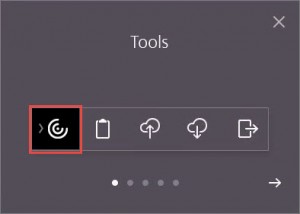
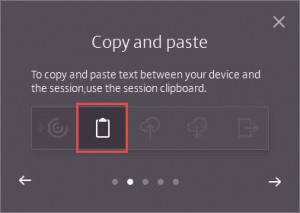
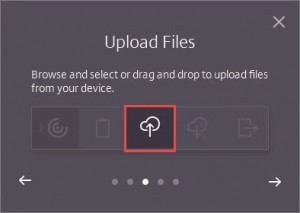
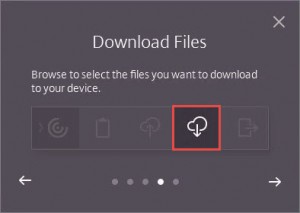
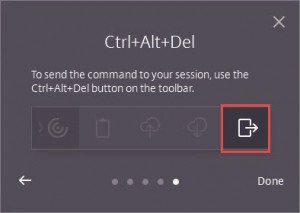
You can Start the Tour optionally as it explains the Receiver for HTML5’s tab functions when clicking the Tools icon:

  • Tools
  • Copy and Paste
  • Upload Files
  • Download Files
  • Ctrl+Alt+Del

wizard_2 wizard_3 wizard_4 wizard_5 wizard_6

You can launch multiple Published Applications as they’re all being executed within the same session and browser tab (thanks to Session Sharing):

html5_12

Citrix Studio confirms that we’re connected using Receiver for HTML5:

html5_11

Further reading:

Citrix ShareFile – SAML Authentication Error after upgrading to NetScaler v11 and Unified Gateway – http/1.1 Service Unavailable

$
0
0

After upgrading my existing and fully functional NetScaler v10.5 Build 57.7 to the latest v11.0 Build 55.23 and implementing Unified Gateway for XenMobile and XenDesktop, my users were unable to SAML authenticate with ShareFile, i.e.

  • by using their MDX wrapped ShareFile app on iOS devices and locking it into an endless authentication loop without any errors:

Photo_20150714_081802

  • by using their ShareFile Outlook Plugin in order to send Download and/or Upload links as they received an error stating Authentication Error – http/1.1 Service Unavailable while trying to utilize the Browser Login included with the ShareFile Outlook Plugin Configuration Wizard:

sharefile_saml_6

  • by authenticating to our company’s custom ShareFile SAML Login page via Browser:

sharefile_saml_11

We’ve implemented a Custom Login Page for ShareFile as described in this article:

sharefile_saml_0

The Login button redirects to https://mysubdomain.sharefile.com/saml/login which in return redirects to my AppController’s ShareFile SAML authentication Web/SaaS … and the NetScaler Login page should be displayed, but instead gave me an error:

sharefile_saml_10

Authentication Flow:

“The following diagram represents the flow of events for user authentication when XenMobile is used as a SAML identity provider:

rtaImage

  1. A user navigates to https://subdomain.sharefile.com/saml/login
  2. ShareFile redirects to https://NSGatewayFQDN/cginfra/https/AppController/samlsp/webssp.do?action …
  3. NetScaler Gateway displays a log on form to the user, who supplies ShareFile log on information.
  4. The authenticated user is logged on to AppController through single sign-on. AppController silently returns a SAML assertion to the user.
  5. The SAML assertion is passed to subdomain.sharefile.com to complete the authentication. The user is then presented with their ShareFile folders at subdomain.sharefile.com.

All ShareFile clients can leverage XenMobile for user authentication using this deployment.”

Obviously there was something wrong with my ShareFile SAML authentication configuration. Thus I had a closer look at it by using the following troubleshooting methodology to investigate all parts involved (have a look at the Further Reading section at the end of this blog for all things ShareFile and SAML):

  • ShareFile Control Plane (WebUI)
  • AppController v9.0.0.97000
  • NetScaler v11 Build 55.23

1. ShareFile Control Plane (WebUI)

As AppController can be configured as a SAML IDP for ShareFile. Verify your ShareFile Single Sign-On Login URL by going to https://<MySubdomain>.sharefile.com, logging in with administrative privileges, navigating to Admin => Configure Single Sign-On => Login URL:

sharefile_saml_7

https://vpx.mydomain.de/cginfra/https/appController2.mydomain.de/samlsp/websso.do?action=authenticateUser&app=ShareFile_SAML_SP&reqtype=1&nssso=true


2. AppController v9.0.0.97000

In AppController you have to configure SAML SSO for ShareFile MDX Apps. You can use AppController along with Worx Home to SSO to ShareFile MDX wrapped applications, i.e. Worx Home obtains a SAML token for the ShareFile login using AppController as an IDP.

Verify that

  • a corresponding SAML authentication server certificate has been installed and is valid as well as trusted by NetScaler and ShareFile:

ac_configuration_1

  • your AppController has been successfully added to ShareFile as an SAML authentication entity:

ac_configuration_2

  • a ShareFile SAML Login Web/SaaS application has been added and configured:

ac_configuration_3


3. NetScaler v11 Build 55.23

The following configuration is required on NetScaler to support the use of AppController as a SAML Identity Provider (IDP):

  • disable the default behavior for requests that come through the /cginfra path
  • create a ShareFile Session Policy and Request Profile
  • configure policies on the NetScaler Gateway vServer

Verify Other Settings:

sharefile_saml_8

Verify ShareFile Session Policy and Profile bound to the NetScaler Gateway vServer:

ns_settings_2

Session Policy Expression:

REQ.HTTP.HEADER Cookie CONTAINS NSC_FSRD

Request Profile Settings:

TabOptionOverride GlobalValue
Client ExperienceHome PageYNone
Client ExperienceSession Time Out (mins)Y1
Client ExperienceSingle Sign On to Web ApplicationsYn/a
Client ExperienceCredential IndexYPRIMARY
Published ApplicationsICA ProxyYON
Published ApplicationsWeb Interface AddressY
Published ApplicationsSingle Sign-on DomainY

Everything seems to be configured as expected and it still didn’t work. After doing some more research I found out that the newly added UG Content Switching vServer Session Policy Expression was missing my ShareFile’s Single Sign-On Login URL as has been configured by adding AppController as a valid SAML authentication entity:

prior:

is_vpn_url || HTTP.REQ.URL.PATH.SET_TEXT_MODE(IGNORECASE).STARTSWITH(“/Citrix/Demo”)

afterwards:

is_vpn_url || HTTP.REQ.URL.PATH.SET_TEXT_MODE(IGNORECASE).STARTSWITH(“/Citrix/Demo”) || HTTP.REQ.URL.PATH.SET_TEXT_MODE(IGNORECASE).STARTSWITH(“/cginfra/https/<FQDN of my internal AC>“)

You have to add the URL part followed right after your NetScaler Gateway’s public URL, e.g.

  • Public NetScaler URL: https://vpx.mydomain.com
  • ShareFile SSO Login URL: https://vpx.mydomain.com/cginfra/https/appController2.mydomain.com/samlsp/websso.do?action=authenticateUser&app=ShareFile_SAML_SP&reqtype=1&nssso=true
  • simply add: /cginfra/https/appController2.mydomain.com as part of the Expression mentioned above

Then I tried to access my ShareFile SAML Login page via browser once more. I successfully got redirected to my NetScaler Login, entered my credentials, and was then authenticated and redirected to ShareFile.

My ShareFile Outlook Plugin worked as well again:

sharefile_saml_9

Further reading:

Citrix XenDesktop 7.x – Black or Blank or Blue Screen when connecting to Published Desktop

$
0
0

Citrix XenDesktop 7.x – Black Screen when connecting to Published Desktop

When connecting to a Windows Server 2008 R2 Published Desktop (provisioned as a VM, not a physical machine) with XenDesktop 7.x you might receive a black and blank Desktop, no Desktop Icons are shown, and the Desktop stays that way:

black_screen_1

Whereas connecting with RDP works normally, as long as the users are members of the local group Direct Access Users.

There are no significant Warnings and/or Error messages in the corresponding server’s Application and/or System Event Log. Everything seems to look and work as expected. In my case the error started showing up after moving the VM from one Hyper-V server to another Hyper-V server.

Having a look into the Citrix\Device\Redirector Application Log in Event Viewer showed an Event ID 261, Event Source: Redirector:

Citrix Device Redirector service could not complete an I/O Redirector Bus operation.

black_screen_2

This can happen due to the following reasons:

  • network issues between XenDesktop Worker hosting VDA and NetScaler/StoreFront
  • wrong graphics card driver in VM when using VMware as a Hypervisor
  • having ghost devices in Device Manager resulting in orphaned drivers on your Windows Server OS
  • having HDX 3D Pro enabled on a physical host during installation of the VDA though not having a compatible graphics card inside
  • Secure Boot is enabled on your Hyper-V Server for the affected VM
  • VDA is corrupt

As per Citrix (CTX135782):

Problem Cause
There are several that could have caused the issue.
A majority of them are related to drive mappings or folder redirections in logon scripts, user profiles and/or GPOs, which point to an incorrect location or experience delays mapping during the logon process.

Possible solutions:

1. Network Issues

As per Microsoft KB314825:

“On a TCP/IP-based wide area network (WAN), communication over some routes may fail if an intermediate network segment has a maximum packet size that is smaller than the maximum packet size of the communicating hosts–and if the router does not send an appropriate Internet Control Message Protocol (ICMP) response to this condition or if a firewall on the path drops such a response. Such a router is sometimes known as a “black hole” router.”

Locate and fix a possible Black Hole Router. Furthermore regard these best practices for your servers:

  • Power Management on the corresponding NIC has been disabled
  • TCP Autotuning has been disabled by executing
    • “netsh interface tcp set global autotuning=disabled”
    • “netsh interface tcp set global rss=disabled”
    • “netsh interface tcp set global chimney=disabled”
  • DEP has been disabled by executing “bcdedit.exe /set {current} nx AlwaysOff”

2. Graphics Card Driver

When using VMware as a Hypervisor change the default graphics card driver coming with VMware tools. The resolution is to uninstall the WDDM or VMware SVGA driver from the affected VM and install Microsoft SVGA driver instead. Refer to CTX124877 and CTX123952:

black_screen_4

Have a look at Jan Hendriks’ blog as well: XenDesktop 7.6 Black Screen issue with VMWare SVGA 3D Driver

3. Remove Ghost Devices

  1. Open a cmd prompt with elevated rights
  2. Execute”SET DEVMGR_SHOW_NONPRESENT_DEVICES=1″
  3. Execute “devmgmt.msc”
  4. Click View => Show Hidden Devices
  5. Expand every single node and remove/uninstall any ghost device found
  6. Reboot server

4. Disable HDX 3D Pro

HDX 3D Pro can only be used on physical machines as long as a compatible graphics card has been installed. In case you provisioned your servers from a base image that somehow utilized this feature in the first place it might come down to the black screen issue when connecting with HDX/ICA. Simply uninstall the VDA from the affected machine, reboot the server, and then reinstall the VDA again. This should suffice.

5. Disable Secure Boot (Hyper-V only)

Shut down the affected VM and execute the following command in Powershell on your Hyper-V Server:

Set-VMFirmware –Vmname <VMName> –EnableSecureBoot Off

In case Secure Boot is enabled on the affected VM the symptoms of a black screen will appear thus rendering the server useless. When trying to install the VDA on a VM with Secure Boot enabled you’ll receive a warning message pointing you to CTX137731. Though the message can be ignored and the installation process continued this is not recommended:

black_screen_3

6. Reinstall VDA:

Simply uninstall VDA from the affected server, reboot the server, and then reinstall the VDA.

7. Set the Registry Key Logon:

Add or set the following registry key on the XenApp/XenDesktop server(s) to resolve the issue:

  • Registry Key: HKEY_LOCAL_MACHINE\SOFTWARE\Wow6432Node\Citrix\Logon
  • Name: DisableStatus
  • Type: REG_DWORD
  • Value: 00000001

My solution:

As for me I had to disable Secure Boot for the affected VM. After that everything worked normal again. I simply forgot to disable Secure Boot after moving the VM from one Hyper-V server to another Hyper-V server.

There are a couple of different registry tweaks available that I usually apply to my Citrix Workers via GPO Preferences as well:

Further reading:

Citrix Receiver for Windows – The connection to “ApplicationName” failed with status (1030) – Updated

$
0
0

Almost everybody has struggled with the now infamous Error 1030 (The connection to “ApplicationName” failed with status (1030)) when connecting with Citrix Receiver for Windows to XenDesktop through NetScaler and StoreFront. There even is an whole armada of articles available out there, totally dedicating their content to troubleshooting this quite generic network error indicating that the connection has failed. Just google it!

error_1030_4

The solution to this error? Well, it depends…

The most common issues based on experience are:

  • required ports blocked in your firewall, especially TCP 1494 and TCP 2598
  • STA configuration mismatch in NetScaler and StoreFront
  • NetScaler licensing issues (Basic Mode vs SmartAccess Mode)
  • DNS name resolution issues
  • Proxy configuration issues
  • SSL issues regarding StoreFront’s server certificate being issued by a private CA that is not trusted by the endpoint
  • launch.ica file issues

As Carl Stalhood once pointed out here:

1030 usually means one of the following:

  • STAs are invalid. STAs on StoreFront don’t match the STAs on the NetScaler Gateway
  • Firewall is blocking TCP 1494 and TCP 2598 from the NetScaler SNIP (not the VIP) to every internal VDA
  • StoreFront did not recognize it as a Gateway connection and is giving out the internal IP of the VDA instead of the gateway address

You can look in the ICA file to make sure it’s trying to use the  Gateway: http://support.citrix.com/article/CTX115304

In my case it turned out that I received the 1030 error as soon as I added my AppController’s STA URL to the StoreFront configuration under the “NetScaler Gateway” node in the “Secure Ticket Authority” option. As far as I know this is required for a XenMobile implementation but as for me it suffices adding the AppController STA URL in NetScaler. This behaviour can be reproduced at any time:

error_1030_1

To get a more detailed error description when connecting, try to disable Desktop Viewer Toolbar as per CTX131867:

error_1030_2

The StoreFront Services Receiver for Web configuration can be modified as follows to disable Desktop Viewer Toolbar:

  1. Log on to StoreFront Services server
  2. Open C:\inetpub\wwwroot\Citrix\<StoreWeb>\web.config with Notepad
  3. Change showDesktopViewer=”false”
  4. Save the changes

After adjusting the web.config file I received the following error instead of the generic 1030 message:

error_1030_3

This error message pointed me in the direction of my AppController as it displayed its STA ID. Upon investigating I found the aforementioned misconfiguration in StoreFront’s NetScaler Gateway settings.

Furthermore you could disable Session Reliability (equals to Common Gateway Protocol (CGP) running on Port 2598) in StoreFront in order to receive a more meaningful error message:

  1. Log on to StoreFront Services server
  2. Open StoreFront MMC
  3. Navigate to NetScaler Gateway node
  4. Select your NetScaler Gateway in the middle pane
  5. Click Secure Ticket Authority in the right pane
  6. Disable checkbox for Enable Session Reliability and click OK

disable_cgp

Another time the firewall was blocking ports TCP 80, 443, 1494, and TCP 2598 from the NetScaler SNIP (not the VIP) to my internal VDA, i.e. Citrix Workers. As soon as the corresponding firewall rules had been adjusted it worked.

2015-10-20 Update:
Once again I had problems pointing to DNS name resolution issues, i.e. you have to ensure that besides the aforementioned ports necessary for smooth communication you have to consider DNS. All Controllers, Workers, and StoreFront servers need to be resolvable by NetBIOS names and FQDN from a client point of view. A client utilized access to XenApp published resources through StoreFront from another network and Active Directory Domain by connecting both networks via VPN. All required ports were available, but we missed to enable a successful name resolution mechanism for client computers in the source domain connecting to Citrix resources in the target domain. Consider multiple DNS Suffices and DNS Suffix Search Lists as well.

So there is no all encompassing solution to this error, instead leaving you to further investigate and keep the aforementioned hints in mind.

Further reading:

Citrix Receiver for Mac – Session Printer Mapping Issues – Printers don’t show or won’t get mapped

$
0
0

Citrix Receiver for Mac – Session Printer Mapping Issues – Printers don’t show or won’t get mapped

As per Citrix CTX140208:

When non-Windows Receivers connect to a Windows 2012 Server with Universal Print Driver (UPD) options configured for client printers, the Post-script (PS) and PCL drivers might not be available, therefore the printers will not get auto-created. As a workaround, to use the Citrix UPD for non-window Receivers, like Mac and Linux, install appropriate drivers on the server manually:

  • PS driver = HP Color LaserJet 2800 Series PS
  • PCL4 driver = HP LaserJet Series II
  • PCL5c driver = HP Color LaserJet 4500 PCL 5

With my Windows Server 2012 R2 I ran into some issues. While trying to add the aforementioned Printer Drivers manually I realized that something was wrong:

hp_cllj_2800_ps

As you can see from the screenshot the button Windows Update is unavailable. This left me with investigating why that is the case. After a little bit of research I ended up with two possible solutions:

  1. Configure the corresponding registry settings for Windows Update
  2. Install a local printer and chose the appropiate model/driver as listed above

Configure Windows Update via Registry:

  1. Run registry editor. Click Start then type regedit and press Enter
  2. Navigate to HKEY_LOCAL_MACHINE\SOFTWARE\Policies\Microsoft\Windows\DriverSearching
  3. Change value of REG_DWORD DontSearchWindowsUpdate to 0
  4. Change value of REG_DWORD DontPromptForWindowsUpdate to 0
  5. Run a Command Prompt. Click Start then type cmd and press Enter
  6. Execute gpupdate /force

Furthermore I found this in the comments here:

HKLM\Software\Policies\Microsoft\Windows\DriverSearching – REG_DWORD – searchorderConfig = 0
This removes that Windows Update button from the Add Printer Wizard. You can either set this key to “2”, or just delete the key to restore the Windows Update button.
This is the “Disable automatic updates of drivers from Windows Updates” feature above.

Install printer locally:

Whereas adding just the required drivers left me with no Windows Update button to click, I found this article pointing me in the right direction:

I had the same issue, but found it only occurred when I was trying to add a network printer. When I try to add a local printer the button shows up. So….. I installed a local printer, allowed Windows Update to download the new drivers and then deleted the local printer. Next I add the network printer again, but this time, because the list of drivers has been refreshed, I didn’t need the Windows Update button because my printer is now in the list.

Upon reading CTX140208 once more it became obvious and clear that I didn’t read the article with the required attention to detail, as it clearly states:

  1. From the Windows Server 2012, choose Add a printer from Devices and Printers.
  2. Continue through the wizard as if you are adding a local printer though it is not attached.
  3. Click Add a local printer > select LPT1: (Printer Port) > click Windows Update.

Silly me!


2015-11-09 Update:

As Alexander Gassner pointed out here I could have checked my Device Installation Settings as well, as they tend to prohibit the Windows Update functionality too:

  • either go for Control Panel | Change Device Installation Settings
  • or search for Change Device Installation Settings

dev_inst_01

  • Select both No, let me choose what to do + Always install the best driver software from Windows Update
  • and hit Save Changes

dev_inst_02


I launched Print Management console, drilled down to the Printers node, right-clicked it and chose Add Printer:

add_printer_01

Then selected Add a new printer using an existing port with LPT1:

add_printer_02

Then selected Install a new driver:

add_printer_03

The Windows Update button was finally there, I hit it, and waited for the updated drivers to get downloaded:

add_printer_04 add_printer_05

Afterwards I was able to select the required drivers and install the required printers:

add_printer_06

As Citrix pointed out in CTX139020, “if there are two versions of this driver displayed, choose the Microsoft version“.

In the end it looked like this:

add_printer_07

Further reading:

Citrix Receiver for Windows – Remove orphaned Start Menu Shortcuts and/or Folders

$
0
0

Did you ever wonder how to get rid of those orphaned Citrix Start Menu Shortcuts and/or folders?

Well, wonder no more! Here is the script (Remove-CitrixShortcuts.ps1) to remove any Citrix-related shortcut (lnk file extension) from selected Paths.

Simply adjust the Paths variable to your requiremets.

#############################################################################
# Script: Remove-CitrixShortcutsps1
# Author: Alexander Ollischer     
# Blog: http://blog.ollischer.com
# Date: 12/14/2015
# Keywords: Citrix Shortcuts, Orphaned Shortcuts, Folders, Empty, Directories, Containers
#############################################################################
# DISCLAIMER
#############################################################################
# THIS CODE IS MADE AVAILABLE AS IS, WITHOUT WARRANTY OF ANY KIND. THE ENTIRE
# RISK OF THE USE OR THE RESULTS FROM THE USE OF THIS CODE REMAINS WITH THE USER.
#############################################################################
 
Clear-Host
$Paths = "$env:APPDATA\Microsoft\Windows\Start Menu\","$home\Desktop\","$env:APPDATA\Microsoft\Internet Explorer\Quick Launch\User Pinned\StartMenu"
#Add some logging...
$LogTime = Get-Date -Format "mm-dd-yyyy_hh-mm-ss"
$LogFile = "$home\Remove-CitrixShortcuts_"+$LogTime+".log"

$wshShell = New-Object -ComObject WScript.Shell
ForEach($Path in $Paths) {
$Files = Get-ChildItem $Path -Recurse -Include *.lnk
foreach ($file in $Files) {
  $shortcut = $wshShell.CreateShortcut($file.FullName)
  if ($shortcut.TargetPath -like "*Citrix*") {
    $shortcut.TargetPath | Out-File $LogFile -Append
    $file.FullName | Out-File $LogFile -Append
    Remove-Item $file
    #Remove-Item $file -WhatIf
  }
  }
}

After that there maybe some empty folders left that need removing, too. Use this script (Remove-EmptyFolders.ps1) after removing the shortcuts in order to remove them as well (courtesy of Chris Brown, who pointed me in the right direction):

$Paths = "$env:APPDATA\Microsoft\Windows\Start Menu\","$home\Desktop\"
#Add some logging...
$LogTime = Get-Date -Format "mm-dd-yyyy_hh-mm-ss"
$LogFile = "$home\Remove-EmptyFolders_"+$LogTime+".log"

# Get each item under the current directory recursively
# enhanced filter by Empty Folders and Verify through File Count
foreach($childItem in (Get-ChildItem $Paths -Recurse | Where-Object {$_.PSIsContainer -eq $True} | Where-Object {$_.GetFiles().Count -eq 0}))
{
    # if it's a folder AND does not have child items of its own
    if( ($childItem.PSIsContainer) -and (!(Get-ChildItem -Recurse -Path $childItem.FullName)))
    {
        # Delete it
        $childItem.FullName | Out-File $LogFile -Append
        Remove-Item $childItem.FullName -Confirm:$false
    }
}

Both scripts can be downloaded here:

Citrix StoreFront – Remove GoToMeeting et al from Published Applications

$
0
0

This one’s quite easy, actually. Did you ever wonder how to remove those GoTo Icons from your StoreFront Store and/or Start Menu Shortcuts?

goto_icons_removal_01

Open your StoreFront Console, navigate to your Store node, select the corresponding Store, and click Integrate with Citrix Online in the right hand pane:

goto_icons_removal_02

Disable all GoTo applications and confirm with OK:

goto_icons_removal_03

Refresh your Applications with Citrix Receiver and they’ll be gone.


Citrix StoreFront – direct Upgrade from v3.0.0.45 to v3.5.0.23 fails with error code 1603 – Fatal error during installation

$
0
0

Citrix StoreFront – Upgrade v3.0.0.45 to v3.5.0.23 fails and the Application Event Log shows an Event ID 0, Source: Citrix Extensible Meta-Installer, stating:

sf_upgrade_error_00

Timestamp: 22.03.2016 11:28:18
Category:Error, WinError
Message:Installation of ‘..\CitrixStoreFront-x64.msi’ failed with error code 1603. Fatal error during installation

With an failed upgrade log files can be found in C:\Windows\Temp\StoreFront\, e.g.:

sf_upgrade_error_04

  • Citrix-DeliveryServicesRoleManager-2016-03-22 11-27-00.log
  • CitrixMsi-CitrixStoreFront-x64-2016-03-22-11-27-21.log

But checking CitrixMsi-CitrixStoreFront-x64-2016-03-22-11-27-21.log revealed nothing useful, except this:

MSI (s) (04:10) [11:28:07:090]: Note: 1: 1708
MSI (s) (04:10) [11:28:07:090]: Product: Citrix StoreFront — Installation failed.
MSI (s) (04:10) [11:28:07:091]: Windows Installer installed the product. Product Name: Citrix StoreFront. Product Version: 3.5.0.23. Product Language: 1033. Manufacturer: Citrix Systems, Inc.. Installation success or error status: 1603.

In Citrix-DeliveryServicesRoleManager-2016-03-22 11-27-00.log I did find something more useful:

[22.03.2016 11:53:02][5224][Information]   ExitCode = “1603
[22.03.2016 11:53:02][5224][Information]   ExitCode.Reason = “Installation of DeliveryServicesRole failed.

As the following suggestions did not work for me neither:

  • delete c:\inetpub\wwwroot\Citrix\Storename\App_Data\CtxsWebProxyIconCache\ folder (backup prior to deleting!)
  • delete c:\ProgramData\Citrix\Storefront Install\3.0.0.44 folder
  • run StoreFront setup executable again

I had to look further, as pointed out here:

Installer can have issues in converting/migrating the custom configuration you might have put in. Although it may be pointing to Authentication however its possible that issues are in STORE\Web.config file.

So I checked my own web.config file, placed in C:\inetpub\wwwroot\Citrix\StoreWeb, but didn’t find any refernces to any bogus, e.g. generatePublisherEvidence, which might have been put there working with an earlier version of StoreFront:

Per Citrix Support: This was a setting that was in place for web interface, some customers may have had this implemented and once updated may have copied their web.config files over as well. This setting was not tested with Storefront and is the reason why the installer fails because its not a standard in the XML file.

Furthermore it’s suggested to check any custom configurations you may have applied to your StoreFront setup, i.e.

  • Customize Receiver Appearance
  • Manage Featured App Groups

I reverted any of my StoreFront’s Stores to Classic Experiences (which saw me losing my Enhanced Experience and Featured App Groups settings flushed down the drain in the process), but to no prevail:

sf_upgrade_error_02

sf_upgrade_error_03

The Application Log’s error code 1603 pointed me to Citrix Discussions:

I had the same 1603 error when trying to do an in-place upgrade from StoreFront 3.0.0.45 to 3.5.0.23.  Tried several reboots and many other troubleshooting steps including all suggestions above, but what worked for me in the end was to install 3.0.1.57 first, reboot, then install 3.5.0.23 on top of that.

This left me with the only choice that seems to work right now, but…. it did not work for me!

For valid upgrade paths to the latest StoreFront v3.5 have a look at Citrix eDocs.

Solution

As the aforementioned error code 1603 is generated by the MSI installer technology and thus not Citrix specific, I dug deeper into that error code and found CTX126640:

Note: The 1603 exit error is a generic installation error which stands for Fatal error during installation. Refer to the MSI installation logs for further traces because this problem does not apply to every situation.

Problem Cause
A previous installation of a Microsoft Visual C++ Redistributable package may cause the installation process to fail.

I compared a working StoreFront v3.5 setup with my failing v3.0 setup and identified several Microsoft Visual C++ 2008 Redistributable packages installed on the failing system:

sf_upgrade_error_05 sf_upgrade_error_06

I decided to remove any of the Microsoft Visual C++ 2008 Redistributable packages and launched the StoreFront v3.5 upgrade executable once more – ét voila! It worked! Problem solved.

Further reading:

Receiver for Mac – Adding a Store fails – Error “could not detect the specified account”

$
0
0

All of a sudden my Mac users started complaining that they are unable to connect to or add a new Store to Citrix Receiver for Mac. Right after entering the NetScaler’s URL and hitting Add, they receive an error stating “Could not detect the specified account” and “The server might be invalid or may be unavailable at this time. Make sure the URL is correct and check your network connection.”

mac_error_01

mac_version_01

Nothing has been changed. Receiver for Mac was the latest version v12.1. No network issues, Safari works just well, navigating to the NetScaler URL, entering credentials, and launching a Citrix session. No certificate issues. Nothing, just as expected. I tried the script as mentioned here, but to no prevail.

Solution:

As all users came in from external networks through NetScaler, I had to disable EdgeSight Monitoring (HTML Injection) in NetScaler’s System | Settings | Configure Advanced Features:

mac_error_02

In my case I didn’t have to disable AppFlow on my NetScaler’s vServer as described by other users having the same issue. It already worked for me after disabling HTML Injection alone:

mac_error_03

The same goes for having issues while connecting with Citrix Receiver for Android, receiving an error stating “An error has occurred while connecting. Check your server address and data connection”. Have a look at Jason Samuel’s blog article as well.

Further reading:

XenMobile 10.x and NetScaler 10.x – A Comprehensive HowTo Guide

$
0
0

During implementing quite some XenMobile 10.x solutions in the last couple of months I came across some issues that caused quite some headaches. Therefore I’d like to document and share my lessons learned in this new blog.

As all my implementations were with existing NetScaler 10.x configurations already in place, I was not able to follow all those XenMobile 10.x installation and configuration guides out there by the book. All of those blogs and guides have one thing in common: they assume your start from scratch with both XenMobile 10.x and NetScaler 10.x and thus miss the point in merging XenMobile 10.x requirements with NetScaler 10.x, i.e. adding all those nasty MDM/MAM LB VIPs, DNS records, firewall rules, certificates, Session Policies and Profiles, et al.

I’m trying to shed some light on how to add a new XenMobile 10.x installation to an already existing NetScaler Gateway configuration.

This blog is comprised of the following topics:

Work in Progress

As implementing and configuring XenMobile can be quite a huge and complex task, I intend to update this article on a regular basis in order to get as close to a comprehensive guide as possible regarding this topic.

Prerequisites & Requirements:

For starters I’d like to recommend the following blogs for all those people out there who start from scratch with both XenMobile and NetScaler, as they provide loads of information on prerequisites and all things required for a (almost) hazzle free implementation:

The XenMobile architecture is quite a beast to tame and needs a lot of mastering in order to beat all its intricacies. Just have a look at the following architecture diagram for a fully blown up XenMobile 10.x MDM+MAM solution placed in your internal network:

XenMobile-RA-MAM-MDM

Recommendations:

  • NetScaler Connectivity Tests
    • can be found on NetScaler | Configuration | Integrate with Citrix Products | XenMobile | Test Connectivity:

15-06-_2016_11-41-53

15-06-_2016_11-46-10

  • XenMobile Connectivity Tests
    • can be found on XenMobile | Support [Wrench Tool] | Diagnostics | XenMobile Connectivity Checks:

15-06-_2016_11-52-18

Enable all checks listed in the XenMobile Connectivity Checks table by activating the checkbox at the top left corner, then click Test Connectivity at the bottom right corner:

15-06-_2016_14-23-30

Ensure that all XenMobile Connectivity Checks are greenlit, i.e. are passed successfully:

15-06-_2016_14-26-10

In case of an error you could left-click the corresponding table entry in order to receive further information and helpful tips on the underlying issue:

15-06-_2016_14-49-11

Rinse and repeat until all checks are successful.

Q&A:

The following articles and blogs are a must read for a deeper understanding of and an insight look into XenMobile 10.x

I tried to create a table showing required IP addresses as well as corresponding NetScaler Gateway vServers necessary for a working XenMobile implementation with an existing NetScaler Gateway configuration:

XenMobile and NetScaler IP Addresses

FQDN/HostnameDescriptionIP AddressNote
mobile.domain.de [internal]
XenMobile Server's FQDN, internally as well as externally; internal IP points to XenMobile Server directly10.0.0.240to make XenMobile Server reachable from internal networks (for administrative purposes); dedicated DNS address record in your internal DNS Zone
mobile.domain.de [external]XenMobile Server's FQDN, internally as well as externally; external IP points to _XM_LB_MDM_XenMobile VIP directly (Ports 443 and 8443)e.g. 1.2.3.4 (=> 10.0.0.228)for registration and enrollment to successfully occur, traffic on both Ports 443 and 8443 must be directed to NetScaler Gateway's vServer IP address (_XM_LB_MDM_XenMobile)
nsip.domain.localNetScaler Management IP10.0.0.252
vpx.domain.de [external]NetScaler Gateway's external FQDN, pointing to Gateway vServer providing XenMobile Session Policy and Profilee.g. 5.6.7.8 (=> 10.0.0.251)existing NetScaler Gateway vServer for access to XenApp/XenDesktop as well as XenMobile resources
_XM_MAM_LB_10.0.0.232_8443XenMobile Server's LB VIP on NetScaler (Port 443), referred to NetScaler Gateway vServer (vpx.domain.de) Session Profile (Account Services Address: https://mobile.domain.de:8443)10.0.0.232
_XM_LB_MDM_XenMobileMDM_10.0.0.228_443XenMobile Server's LB VIP on NetScaler (Port 443), referred to by externally resolvable FQDN (mobile.domain.de)10.0.0.228
_XM_LB_MDM_XenMobileMDM_10.0.0.228_8443XenMobile Server's LB VIP on NetScaler (Port 8443), referred to by externally resolvable FQDN (mobile.domain.de)10.0.0.228
vpx.domain.de [internal]NetScaler Gateway vServer for XenMobile access after succesful enrollment; referred to by XenMobile Server10.0.0.251provides Session Policy and Profile to redirect incoming Worx Home traffic via vpx.domain.de to XenMobile Server
mobile.domain.de [NetScaler DNS Address Record]XenMobile Server's FQDN, internally as well as externally; internal IP must be resolved to _XM_MAM_LB VIP from a NetScaler point of view10.0.0.232dedicated DNS address record is required on NetScaler to directly point traffic to _XM_MAM_LB VIP

For an already existing NetScaler Gateway configuration the following Session Policy and Profile must be added to the corresponding vServer for XenMobile traffic to be supported:

Session Policy:

  • Name: pol_Worx_home_vpx.domain.de
  • Profile: ac_Worx_Home_vpx.domain.de
  • Expression:
    REQ.HTTP.HEADER User-Agent CONTAINS zenprise && REQ.HTTP.HEADER User-Agent CONTAINS CitrixReceiver && REQ.HTTP.HEADER X-Citrix-Gateway EXISTS || REQ.HTTP.HEADER User-Agent CONTAINS CitrixReceiver && REQ.HTTP.HEADER X-Citrix-Gateway EXISTS && REQ.HTTP.HEADER User-Agent CONTAINS Worx

Session Profile / Action:

TabOptionOverride GlobalValue
Client ExperienceSplit TunnelYOFF
Client ExperienceSession Time Out (mins)Y1440
Client ExperienceClientless AccessYON
Client ExperienceClientless Access URL EncodingYCLEAR
Client ExperiencePlugin TypeYWindows/MAC OS X
Client ExperienceSingle Sign-on to Web ApplicationsYn/a
Client ExperienceCredential IndexYPRIMARY
SecurityDefault Authorization ActionYALLOW
SecuritySecure BrowseYENABLED
Published ApplicationsICA ProxyYOFF
Published ApplicationsAccount Services AddressYhttps://mobile.domain.de:8443
NetScaler XenMobile 10 Session Profile

Troubleshooting:

Keep in mind that for troubleshooting purposes it’s always recommendable to not just turn to XenMobile’s and NetScaler’s Connectivity Tests (as mentioned above), but to its logging capabilities as well, i.e. investigating its corresponding Debug Logs, Admin Audit Logs, and User Audit Logs, which can be found under in Support [Wrench Tool] | Log Operations | Logs:

10-06-_2016_12-13-28

Log Levels can be adjusted accordingly in Support [Wrench Tool] | Log Operations | Log Settings.

iOS Enrollment Issues:

Worx Home Enrollment Error – Push service on server is not enabled. Please contact the administrator.

20160601_112119000_iOS

Make sure your XenMobile server has internet access and can reach ports TCP 2195 and TCP 2196 at destination APNs hosts using the public IP address 17.0.0.0/8. Have a look at Citrix eDocs – Port Requirements as well.

Worx Home Enrollment Error – Profile Installation Failed. A network error has occured.

20160606_130239000_iOS

In my case it turned out that XenMobile server’s hostname deviated from my external FQDN as I configured it with an internal FQDN instead. I dug deep into XenMobile server’s Debug Log File and found the following entry while trying to enroll my iOS device:

08-06-_2016_10-16-56

Unfortunately you cannot change the hostname afterwards, thus requiring you to reinstall XenMobile. So make sure that during initial configuration, while defining the XenMobile Server FQDN, it equals your external FQDN:

08-06-_2016_08-51-3608-06-_2016_08-55-13

Worx Home Enrollment Error – Access to your company is not currently available.

20160608_080510000_iOS

Ensure that XenMobile Server’s certificate including corresponding private key and certificate chain is complete and intact:

08-06-_2016_09-05-43

Best practice is to import the server certificate in PFX file format including

  • private key,
  • all certificates in the certification path,
  • and extended properties.

During import you should select all options as depicted:

  • Import: Keystore
  • Keystore type: PKCS#12
  • Use as: Server
  • Keystore file: <certificate.pfx>
  • Password: <password to your private key>

08-06-_2016_09-05-20

In the end it should look like this in order for you to successfully register and enroll a device with XenMobile:

  • Server
  • SSL Listener
  • SAML
  • APNs

08-06-_2016_09-10-59

Worx Home Enrollment Error – An error occurred. The enrollment will stop.

20160608_112129000_iOS

Security:

Read Anton van Pelt’s blog on hardening your NetScaler configuration in order to receive the most precious of ratings: the Qualys SSL Labs A+ Rating. Most recommendable! And there are a lot of Citrix Mobility and NetScaler Master Class videos available on YouTube. Make sure to check them out as well!

Further Reading:
Citrix XenDesktop 7.x – Client Drive, LPT and COM Port Mapping not working properly

$
0
0

Starting with Citrix XenDesktop 7.x there have been some features that have been deprecated by Citrix, such as LPT and COM Port Mapping, which are not working as expected or properly after upgrading to VDA 7.x. I stumbled upon this quite annoying issue as soon as I upgraded my existing Citrix XenApp servers to the latest XenDesktop 7.x, i.e. Hosted Shared Desktops with Virtual Desktop Agents v7.x.

As for me my legacy servers, that is Citrix Presentation Server 4.5, had COM Port Mapping/Redirection enabled, in order to provide access to a locally installed COM Port devices (data logger reading devices) for XenApp published applications. This worked fine as long as the system has not been touched by any means. While migrating to XenDesktop 7.x (with all new shiny Windows Server 2008 R2 and Windows Server 2012 VMs), I had to install and upgrade all previously used applications in order to make them work on the new Microsoft O/S. Even the data logger reading application made it to Windows Server 2012, as an upgrade was available. But from then on I had quite some trouble getting the COM Port Mapping/Redirection feature back to work as it previously did…

As you might have noticed there is a Citrix Policy setting in Citrix Studio that says:

  • Client COM Port Redirection
  • Auto Connect Client COM Ports

I eagerly configured those policy settings in order to allow and redirect COM ports, but it didn’t work. These settings simply did nothing! I realized that these settings only take effect if used with XenDesktop versions up to v5.6 FP1. With later VDAs, such as v7.x, it doesn’work anymore. I did some digging and found something in Citrix eDocs titled Features not in this release:

COM Port Mapping — COM Port Mapping allowed or prevented access to COM ports on the user device. COM Port Mapping was previously enabled by default. In this release, COM Port Mapping is disabled by default. For details, see Configure COM Port and LPT Port Redirection settings using the registry.

And further:

Policy settings for COM Port and LPT Port Redirection have been deprecated from the Studio, and moved to the registry, and are now located under HKLM\Software\Citrix\GroupPolicy\Defaults\Deprecated on either your Master VDA image or your physical VDA machines.

Alas! A solution to my problem. Mind that all registry keys depicted in the following table are of type REG_DWORD:

Registry KeyRegistry Key TypeDescriptionValues
AllowComPortRedirectionREG_DWORDAllow or prohibit COM port redirection 1 (Allow) or 0 (Prohibit)
LimitComBwREG_DWORDBandwidth limit for COM port redirection channel Numeric value
LimitComBWPercentREG_DWORDBandwidth limit for COM port redirection channel as a percentage of total session bandwidth Numeric value between 0 and 100
AutoConnectClientComPortsREG_DWORDAutomatically connect COM ports from the user device1 (Allow) or 0 (Prohibit)
AllowLptPortRedirectionREG_DWORDAllow or prohibit LPT port redirection1 (Allow) or 0 (Prohibit)
LimitLptBwREG_DWORDBandwidth limit for LPT port redirection channelNumeric value
LimitLptBwPercentREG_DWORDBandwidth limit for LPT port redirection channel as a percentage of total session bandwidthNumeric value between 0 and 100
AutoConnectClientLptPortsREG_DWORDAutomatically connect LPT ports from the user device1 (Allow) or 0 (Prohibit)


Further reading:

How to use Citrix Cerebro – XenMobile Troubleshooting Tool

$
0
0

As I’m always thankful for any tool that might come in handy during troubleshooting sessions I thought that this might be interesting for you NetScaler/XenMobile guys as well. Just recently I stumbled upon this neat little article: CTX141060 – Citrix Cerebro – XenMobile Troubleshooting Tool and the tool it provides: Citrix Cerebro (what kind of name is that actually?):

cerebro_1

This quite comprehensive article explains the tool’s core functionality pretty well, so there’s not much to add right now. Therefore I simply share my experience here while using this tool in order to troubleshoot some XenMobile issues I had just recently: Access to your company network is not currently available while setting up WorxMail.

Description

Citrix Cerebro is a diagnostic tool developed to help analyze and debug XenMobile deployments. The tool can perform an analysis of the NetScaler Gateway configuration (ns.conf) file. Citrix Cerebro can also perform online connectivity checks with the back-end servers that are configured with the NetScaler Gateway server. To achieve this, Citrix Cerebro needs to be run on a Windows machine that can communicate with a NetScaler Gateway Server.

The analysis of ns.conf file validates the configuration for XenMobile setup and can point to missing policies, syntax issues and consistency issues.

Prerequisites

  • Administrative permissions to your NetScaler
  • Your NetScaler’s NSIP (aka Management IP)
  • Microsoft Excel installed on the same platform as Citrix Cerebro in order to successfully export the results to a XLS file
  • Open required ports from source IP to NSIP on your firewall:

Network Connectivity – Verify that you can ping and/or SSH into the NetScaler appliance.
Java Ports – Verify that you can connect to the ports used by Java. If you’re accessing the NetScaler GUI over HTTP then the Java port is TCP/3010. If you’re accessing the GUI over HTTPS then the Java port is TCP/3008. A simple telnet to the correct port should verify no firewalls are blocking communication.

Following the instructions pointed out in the article I launched Cerebro, connected to and analyzed my NetScaler configuration. Cerebro catches the configuration file ns.conf from your NetScaler (in read-only mode) and starts analyzing your environment (i.e. an Online Analysis). Make sure to enter your NetScaler’s NSIP while connecting (as referred to as Management IP), your administrative credentials, and click Start Analysis:

cerebro_2

In case you don’t have direct online access to your NetScaler you could chose an Offline Analysis, i.e. obtaining the ns.conf file, saving it on your local machine, and pointing Cerebro in the right direction.

My first results looked something like this:

cerebro_3

I even opted to enable some Advanced Results by enabling ShareFile, Web Receiver, and ShareFile Auth:

cerebro_4

You will be presented with the status of configuration checks and “Recommended Configurations” in case if there are any issues. When there are configuration issues, you will see the status as RED. The results of the connectivity checks are displayed as below. If there is some problem with the server’s connectivity, it will be shown as RED. You can see the status of the faulty server on the right side.

For instance the tool pointed out that my LDAP authentication configuration was missing the corresponding credentials in order to access my AD:

cerebro_5

Thus I verified and adjusted the corresponding settings in NetScaler:

cerebro_6

Furthermore it told me that some settings regarding my Session Policy and Profile for Receiver for Web are missing or plain wrong (though they were being configured by NetScaler’s own wizard):

cerebro_7

I adjusted them accordingly as well:

cerebro_8 cerebro_9

Verdict: All in all it seems quite a handy tool for troubleshooting purposes and can be considered a useful addition to your troubleshooting and analysis methodology.

For more things XenMobile read my blog XenMobile 10.x and NetScaler 10.x – A Comprehensive HowTo Guide including more troubleshooting tips.

Further reading:

MDX Toolkit v10.x – Command Line Wrapping in a Mac OS X Virtual Machine (VM)

$
0
0

When trying to execute the MDX Toolkit v10.x in a Mac OS X Virtual Machine you might be left with empty dialogue boxes:

mdx_toolkit_1  mdx_toolkit_2

This is due to the MDX Toolkit not running in a virtualized Mac OS X environment, thus having to revert to Command Line Wrapping.

Note: the following articles explain all the prerequisites and basic setup required for MDX Toolkit to work properly.

Prerequisites:

  1. How to get an APNS (Apple Push Notification Service) certificate for use with XenMobile MDM
  2. Installing and Configuring the Citrix MDX Toolkit Build 2.2.1 v372 and Wrapping Apps

As soon as all has been set up successfully you can start MDX wrapping with the Command Line tool CGAppCLPrepTool. It’s quite easy actually as you only need to know the paths to your IPA files und where to place the MDX files.

The Syntax is as follows:

Usage: CGAppCLPrepTool [ Wrap | Sign | SetInfo | GetInfo ] -Cert CERTIFICATE -Profile PROFILE -in INPUTFILE -out OUTPUTFILE -appDesc DESCRIPTION -logFile LOGFILE -logWriteLevel LEVEL -logDisplayLevel LEVEL

Full help of Wrap script, with example
———————————————————
Wrap Command
———————————————————
CGAppCLPrepTool Wrap -in INPUTFILE -out OUTPUTFILE -Cert CERTIFICATE -Profile PROFILE -appDesc DESCRIPTION

-Cert CERTIFICATE ==> (Required)Name of the certificate to sign the app with
-Profile PROFILE ==> (Required)Name of the provisioning profile to sign the app with
-in INPUTFILE ==> (Required)Name of the input app file
-out OUTPUTFILE ==> (Required)Name of the output mdx file
-appName NAME ==> (Optional)Friendly name of the app
-bundleID BUNDLEID ==> (Optional)Bundle ID to be used for wrapped app (if different)
-upgrade ==> (Optional)Preserve in-place upgrade capabilty (not recommended for new apps)
-appDesc DESCRIPTION ==> (Optional)Description of the package
-minPlatform VERSION ==> (Optional)Minimum supported platform version
-maxPlatform VERSION ==> (Optional)Maximum supported platform version
-excludedDevices DEVICES ==> (Optional)A list of device type the App is not allowed to run
-logFile LOGFILE ==> (Optional)Name of the log file
-logWriteLevel 0-4 ==> (Optional)Log level for file
-logDisplayLevel 0-4 ==> (Optional)Log level for standard output
-storeURL url ==> (Optional; SDK) http://appstoreaddress/adHoc/citrix.ipa
-policyXML ==> (Optional) defaults to to usage of internal policy definition
-noStripExtensions ==> (Optional) Leave iOS extensions in app

—————EXAMPLE——————–

For creating MDX package for IT admin:
Wrap -Cert “iPhone Distribution: Company Name” -Profile “distribution.mobileprovision” -in “input.ipa” -out “output.mdx” -appdesc “Test App Version 1.0” -minPlatform “7.0” -maxPlatform “9.0”

—————EXAMPLE——————–

Example script for updating MDX package for ISV:
CGAppCLPrepTool SetInfo -in “/Users/joeadmin/apps/input.mdx” -out “/Users/joeadmin/apps/converted/output.mdx” -storeURL “https://itunes.apple.com/us/app/w1browser/id579414750?ls=1&mt=8”

Example script for resigning an IPA package:
CGAppCLPrepTool Sign -Cert “iPhone Developer: Joe Admin (12MMA4ASQB)” -Profile “team_profile.mobileprovision” -in “/Users/joeadmin/apps/input.ipa” -out “/Users/joeadmin/apps/resigned/output.ipa”
——————————————————————

The basic command line looks like this:

./CGAppCLPrepTool Wrap -in “<ipaFile> -out “<mdxFile>” -Cert “<certName>” -Profile “<ProfileName>”

Where:

  • certName = the name of your APNS certificate
  • ProfileName = the name of your Apple Mobile Provisioning profile
  • ipaFile = the name of your IPA file (Input)
  • mdxFile = the name of your MDX file (Output)

For instance:

./CGAppCLPrepTool Wrap -in “./WorxWeb_10.0.07.41.ipa” -out “./WorxWeb_10.0.07.41.mdx” -Cert “iOS Distribution: Alexander Ollischer (3UTRVFVCW2)” -Profile “./iOS_Distribution.mobileprovision”

CGAppCLPrepTool can be found in ./Applications/Citrix/MDXToolkit:

21-06-_2016_12-39-39

In order for CGAppCLPrepTool to find the corresponding APNS certificate you have to place it under System in your local Keychain Access console:

21-06-_2016_12-25-46

Next you have to Trust the server certificate’s issuer, e.g. the whole cain of certificates have to be trustworthy (in case they’re not). Make sure the When using this certificate option is set to Use System Defaults, as custom trust policy settings might cause issues while wrapping apps:

23-06-_2016_08-36-48

Furthermore make sure the underlying certificate chain is valid, i.e. install the corresponding Issuer’s CA certificate as well as intermediate certificates (Applications | Utilities | Keychain Access | System), in my case Apple Worldwide Developer Relations Certification Authority. Set the trust policy settings to Use System Defaults as well:

apns_123-06-_2016_08-32-30

Reading the Citrix Blog XenMobile MDX Apps wrapping issues is recommended.

Last but not least: the corresponding Mobile Provisioning profile has been placed within the same folder as CGAppCLPrepTool (for convenience and ease of access), as well as corresponding IPA files:

21-06-_2016_12-31-40

Troubleshooting:

Error: Failed to execute dylibcodesign with exit code: 1

21-06-_2016_13-01-57

Problem Cause:

  • Command Line Tools is not installed in the Xcode
  • Missing private key or chain from the distribution certificate
  • Distribution certificates with identical names

In my case I had an expired certificate in my Keychain that needed replacement:

21-06-_2016_13-23-47

The most recent Apple certificates can be download from http://www.apple.com/certificateauthority/

See CTX135253 and Jarian Gibson’s article here.

Further reading:

Citrix Receiver – How to speed up App Enumeration and Start Menu Population

$
0
0

Citrix Receiver – How to speed up App Enumeration and Start Menu Population

Important: settings in HKCU have preference over HKLM.

If the user has enabled RemoveappsOnLogoff and RemoveAppsonExit, and is experiencing delays in app enumeration at every logon, then the following workaround configuration should reduce the delay:

  • reg add HKCU\Software\Citrix\Dazzle /v ReuseStubs /t REG_SZ /d “true”
  • reg add HKLM\Software\Citrix\Dazzle /v ReuseStubs /t REG_SZ /d “true”

Keep in mind that all Citrix related registry changes need to be placed in

  • HKLM\SOFTWARE\Wow6432Node\Citrix\Dazzle (for x64 Windows O/S)
  • HKLM\SOFTWARE\Citrix\Dazzle (for x86 Windows O/S)

respectively.

Improve Start Menu Population and Icon Loading Time

HKLM\SOFTWARE\Wow6432Node\Citrix\Dazzle
“MaxSimultaneousFetches”=dword:00000006
“MaxSimultaneousSubscribes”=dword:00000006

HKLM\SOFTWARE\Wow6432Node\Citrix\Dazzle
“InitialRefreshMinMs”=REG_SZ:1
“InitialRefreshMaxMs”=REG_SZ:1

IE – Automatically detect settings 

IE usually is configured to automatically detect Proxy Settings which could cause an issue with App Enumeration and Start Menu Population as well. Adjusting the following registry key will do the trick:

HKCU\Software\Microsoft\Windows\CurrentVersion\Internet Settings
“AutoDetect”=dword:00000000

After adding this value and checking the corresponding IE setting in Internet Options | Connections | LAN Settings you’ll possibly see that the aformentioned value has been moved to a new location:

HKCU\Software\Microsoft\Windows\CurrentVersion\Internet Settings\ZoneMap
“AutoDetect”=dword:00000000

As it’s a quite volatile setting, i.e. as soon as you (or an user) changes anything within your IE configuration, the setting gets lost. I use GPO Preferences in order to maintain that setting and it works.

Further reading:


How To – Citrix ShareFile SAML Authentication with Microsoft AD FS 2.0 or 3.0 – Lessons Learned

$
0
0

In order to make this work, check out the Prerequisites section, and read my other articles about installing and configuring AD FS prior to setting them up with ShareFile and/or NetScaler. This setup requires multiple steps with functional verification tests in between each step in order to minimize sources of error.

Prerequisites:

  • Public Signed Server Certificate adfs.domain.com
  • Firewall configuration allowing external traffic destined for your internal AD FS server to pass through (https, Port 443)
  • AD FS 2.0 downloadable installer (for Microsoft Windows Server 2008 and 2008 R2)
  • Internet Information Services (IIS) 7 or 7.5 Server Role installed (for Microsoft Windows Server 2008 and 2008 R2)
  • AD FS 3.0 Server Role installed (for Microsoft Windows Server 2012 R2)
  • Internet Information Services (IIS) 8.5 Server Role installed (for Microsoft Windows Server 2012 R2)
  • .NET Framework 3.5 SP1 Feature installed
  • SQL Server 2005 (Express, Standard, Enterprise), SQL Server 2008 (Express, Standard, Enterprise), or Windows Internal Database

Detailed HowTo’s for AD FS Installation and Configuration can be found here:

  • HowTo – Install and Configure Microsoft Active Directory Federation Services 2.0 (AD FS 2.0)
  • HowTo – Install and Configure Microsoft Active Directory Federation Services 3.0 (AD FS 3.0)

AD FS related errors can be found in the Event Log by expanding the Applications and Services Logs node, and navigating to AD FS 2.0 \ Admin (for Windows Server 2008 and 2008 R2):

adfs_error_logs_01

My working ShareFile Single sign-on / SAML 2.0 Configuration with AD FS 2.0 looks like this:

adfs_working_config_dc2_02

Testing your setup:

  • https://mydomain.sharefile.com/saml/login
  • https://adfs.mydomain.com/adfs/ls
  • https://adfs.mydomain.com/adfs/ls/IdpInitiatedSignOn.aspx

Lessons learned during my configuration

Error Signin ADFS:

adfs_error_signin_03

adfs_error_signin_01 adfs_error_signin_02

Add corresponding ShareFile Subdomain URLs to Relying Party Trusts configuration (in my case I had to add both sharefile.com and sharefile.eu TLDs):

  • Tab: Identifiers
  • Tab: Endpoints

adfs_error_signin_04 adfs_error_signin_05

Error Signin ADFS:

adfs_error_signout_02

Event Log Error, Event ID 364, Source: AD FS 2.0, Error Number: MSIS7000

Have a look at TechNet – Troubleshooting Fedpassive request failures with AD FS 2.0

adfs_41

Encountered error during federation passive request.
Additional Data
Exception details:
Microsoft.IdentityServer.Web.RequestFailedException: MSIS7000: The sign in request is not compliant to the WS-Federation language for web browser clients or the SAML 2.0 protocol WebSSO profile.
at Microsoft.IdentityServer.Web.Dispatchers.UnknownRequestDispatcher.DispatchInternal(PassiveContext context)
at Microsoft.IdentityServer.Web.PassiveProtocolHandler.ProcessRequestInternal(PassiveContext context)
at Microsoft.IdentityServer.Web.PassiveProtocolHandler.ProcessRequest(HttpContext context)

I found something interesting at Windows Identity Foundation 101’s : WS-Federation Passive Requestor Profile (part 1 of 2), when searching for MSIS7000:

ADFS v2 does not support WS-Federation POST sign-in, only GET.

HTTP Error 401. The requested resource requires user authentication

sf_saml_internal_error_401_02

sf_saml_internal_error_401_03

It turned out I had to start the AD FS service with proper credentials. As I had issues with launching the service, I switched it to LOCAL SYSTEM, which in return caused this particular issue. So, first I had to remedy the issue of failed service start by configuring the SPN for the service account, and providing internet access to my AD FS server in order to enable querying if CRL through .NET. Then I adjusted the corresponding Application Pool in IIS on my AD FS server in order to reflect the AD FS service’s account. In the end I was able to start the service properly. Afterwards SAML SSO from internal networks worked as well.

Have a look at:

Error Signout ADFS:

adfs_error_signout_02

adfs_error_signout_01 adfs_error_signout_03

Add Logout URL to Relying Party Trusts configuration:

  • Tab: Endpoints
  • Endpoint Tpye: SAML Logout
  • Binding: POST
  • URL: https://adfs.domain.de/adfs/ls/?wa=wsignout1.0

adfs_error_signout_04

adfs_error_signout_05

Now as we have successfully configured a working SSO environment using ShareFile and AD FS, we can go the extra mile and add NetScaler to the equation, of course as a means of security enhancement. As you should never ever expose an ADFS server to the internet, you could use NetScaler as a Proxy.

Errors:

  • SAML Assertion verification failed; Please contact your administrator“, i.e. incorrect IDP certificate configured on NetScaler

saml_sso_NS_error_01

saml_sso_NS_error_02

  • Http/1.1 Internal Server Error 43531

saml_sso_NS_error_03

Run one of the following commands from the shell prompt of the NS to view the real time hits on the (as per CTX138840)

  • authentication policies and session policies applied on the NS Gateway vServer:

    nsconmsg –d current –g pol_hits

  • rewrite policy bound at a global level or to a load balancing, content switching, or NS Gateway vServer:

    nsconmsg –d current | egrep –i rewrite

  • responder policy bound at a global level or to a load balancing, content switching, or NS Gateway vServer:

    nsconmsg –d current | egrep –i responder

In order to troubleshoot authentication with Aaad.debug (as per CTX114999) run the following command from the shell prompt of the NS:

  1. cd /tmp
  2. cat aaad.debug

Another Event ID 364 error message:

  • MSIS2001: Configuration service URL is not configured.
  • MSIS7012: An error occurred while processing the request. Contact your administrator for details

After checkings the AD FS 2.0 service I discovered that it was not running. When trying to start the service it did not start and subsequent Events 7000 and 70009 were logged in Event Log Viewer. It turned out that the server hosting AD FS 2.0 need internet access or you need to disable generatePublisherEvidence for .NET 3.5. See:

Service Control Manager (SCM) is timing out the service start before it is complete. This is usually due to lack of internet connectivity from the AD FS 2.0 Federation Server or AD FS 2.0 Federation Server Proxy. At service start, when generatePublisherEvidence is enabled for .NET 3.5, the server will attempt to connect to crl.microsoft.com over TCP port 80. AD FS 2.0 does not rely on a positive or negative response from generatePublisherEvidence, and the default value can cause Service Control Manager to time out while waiting on the TCP/80 connection to fail to connect to crl.microsoft.com.

Further reading:

XenApp/XenDesktop –“Please Wait For Local Session Manager” message when logging into RDS

$
0
0

I came upon this quite frequent issue with my XenDesktop 7.8 Hosted Shared Desktop environment based on Windows Server 2008 R2. Folder Redirection via GPO is in place, whereas Citrix User Profile Management is not used.

I tried the following to no prevail:

  • remove C:\Users\Default\AppData\Local\Microsoft\Windows\userclass.dat (which did not exist on my system in the first place)
  • related to Desktop Experience, i.e. C:\Windows\System32\TSTheme.exe (removed Users group from Reading the executable, renamed the executable)
  • Microsoft Hotifx KB2661001 for Windows Server 2008 R2
  • disabling Windows Search service
  • modified the XenApp server to force IPv4 to take precedence over IPv6 (already disabled IPv6 as described in KB929852 in the first place)
  • analyzed potential Folder Redirection issues
  • adding DisableStatus=00000001 in HKLM\SOFTWARE\Wow6432Node\Citrix\Logon as per CTX135782
  • and all else described at Citrix XenApp – Long logon times and potential fixes

Group Policy Logon Delay

As per Carl Stalhood – Citrix Group Policy Logon Delay Workaround:

Citrix Discussions Xenapp 7.9: Wait for local session manager: “I have a Xenapp 7.9 environment on Windows 2012 R2. When logging in through Citrix I got message “Wait for local session manager” for 20-30 seconds. When logging in to the server with RDS, I do not have to wait for this.”

“Add the following 2 registry keys to your 7.9 VDA server – then try connecting to it using ICA to see if the issue still occurs:

Add reg keys in “HKLM\SOFTWARE\Citrix\GroupPolicy

  • REG_DWORD: “CacheGpoExpireInHours” – Value = 5-24 (# of Hours) ***start with value of 5***
  • REG_DWORD: “GpoCacheEnabled” – Value = 1

Restart the machine after adding these registry keys and attempt an ICA connection (at least twice) to see if that helps the Login delay.”

Multi-Homed DCs

In case you have multi-homed Domain Controllers, i.e. with at least two NICs and thus two different IP addresses, and of which one NIC happens to be connected to a non-routable network, this might cause this issue as well (pls read Please wait for the Local Session Manager). If the NIC connectecd to the non-routable network is goig to register its IP address with DNS and your XenApp server tries to connect to this exact same IP address in return (through DNS name resolution), the connection attempt would time out eventually and then authenticate against another, reachable DC. To remedy this situation do as described in KB975808:

  • Ensure Register this connection’s addresses in DNS is unchecked on the NIC’s TCP/IP Advanced IP Settings under the DNS tab
  • Issue the command netsh int ipv4 add address <Interface Name> <ip address> <subnet mask> skipassource=true

My Troubleshooting Methodology

As none of the above worked for me I had to further investigate the issue. I started with analyzing the actual Logon Process and Logon Duration with both ControlUp’s Analyze_Logon_Duration.ps1 and Citrix Director.

In order to run the script make sure that Audit Process Tracking has been enabled as per Citrix Blog and KB921468, otherwise you could receive error messages stating Could not find Network Providers events (requires audit process tracking) or Could not find Pre-Shell (Userinit) events (requires audit process tracking) when running the Powersell script:

10-08-_2016_15-13-15

With Citrix Director I found out that my Logon Duration took 43sec, especially the Interactive Session part of the Logon Process:

10-08-_2016_13-13-40

Interactive Session is defined as per Citrix eDocs as follows:

This is the time taken to “hand off” keyboard and mouse control to the user after the user profile has been loaded. It is normally the longest duration out of all the phases of the logon process and is calculated as follows:

Interactive Session duration = Desktop Ready Event Timestamp (EventId 1000 on VDA) – User Profile Loaded Event Timestamp (EventId 2 on VDA)

The following Citrix Blog explains the Interactive Session part of the Logo Duration in detail. It mentions another article which suggests adding a registry value in order to reduce the startup delay further:

HKEY_CURRENT_USER\Software\Microsoft\Windows\CurrentVersion\Explorer\Serialize
REG_DWORD: StartupDelayInMSec
Value: 0

StartupDelayInMSec

Well, it worked in that particular case in that it reduced my Logon Duration a little bit more. But not to a point where it seemed acceptable for my users.

In the end I uninstalled the following, just recently released maligned Microsoft Updates:

After rebooting my affected server the issue went away, as my Logon Duration (especially Interactive Session) came down to a total of 17sec:

logon_duration_reduced_Director

logon_duration_reduced_ControlUp

Further investigation was therefore not possible at this point of time. I’ll keep a look at it and will update this article accordingly. And have a look at the Links at the bottom of my blog as well.

Further reading:

Citrix NetScaler v11 – How to setup your NetScaler as an AD FS proxy

$
0
0

This short blog describes how to enable NetScaler 11’s Content Switching feature to proxy your AD FS infrastructure thus getting rid of a dedicated AD FS Proxy server.

Courtesy of Trond Eirik Haavarstein it was quite easy to enable NetScaler 11 to proxy my AD FS 3.0 implementation instead of a separate dedicated ADFS proxy. I scoured the Internet for ages to find a working guide regarding NetScaler and AD FS fronting. Finally, it’s here, and I’d like to further spread the word!

In order to successfully implement this solution the following requirements must be met (see HowTo – Install and Configure Microsoft Active Directory Federation Services 3.0 (ADFS 3.0) as well):

  1. Server Certificate
  2. Public IP Address
  3. DNS A-Record
  4. AD FS Service up and running

To understand how AD FS works, let’s look at what happens when a federated user tries to log into, say, Office 365 (or ShareFile):

20161104_netscaler_adfs_proxy

  1. An end user tries to log into Office 365 using his user principal name (UPN).
  2. The authentication platform verifies the UPN and sees that the end user is a federated identity. It redirects the authentication request to the end user’s AD FS server. The Office 365 platform knows the URL because a trust was set up earlier between the AD FS infrastructure and Office 365.
  3. The client connects to the AD FS proxy (now represented by NetScaler’s Content Switching vServer) and provides credentials.
  4. The AD FS proxy (read: NetScaler) forwards the authentication request to the AD FS server.
  5. The AD FS server verifies the credentials with the local Active Directory.
  6. When the credentials are verified, a Domain Controller returns a Kerberos token to the AD FS server.
  7. The AD FS server disregards the Kerberos token and crafts a new AD FS token, which it forwards to the AD FS proxy server (read: NetScaler).
  8. The AD FS proxy server (read: NetScaler) forwards the AD FS token to the client.
  9. The client presents the AD FS token to Office 365, is authenticated, and logged in.

1. Server Certificate

…including the corresponding AD FS domain names (PFX file format, i.e. including Private Key, for the corresponding NetScaler Virtual Servers and required Subject Alternate Names (SAN)). I used the exact same Server certificate that’s implemented on my AD FS IIS server.

2. Public IP Address

…pointing to Netscaler’s Content Switching Virtual Server, by means of a corresponding firewall rule forwarding traffic on port 443 (https).

3. DNS A-Record

…e.g. adfs.domain.com, pointing to your Netscaler’s Content Switching Virtual Server, i.e. the aforementioned Public IP Address (keep in mind that the FQDN at least must match the Server Certificate’s Subject Alternate Name (SAN)).

4. AD FS Service

…running and working properly on the internal network, obviously.

5. NetScaler Configuration

I have to agree that configuring NetScaler with CLI is much more easier and faster compared to using the GUI. I recommend getting to grips with to its CLI syntax as it’s like using PowerShell: fast, efficient, transparent. The following commands (borrowed from Trond and slightly adjusted for my purposes) should help you getting to know CLI:

You have to manually replace the following with your corresponding information:

  • 10.0.0.221 with IP address of your internal AD FS server
  • unified with the name of your NetScaler Content Switching vServer name
  • adfs.domain.com with the FQDN of your external DNS A-Record (read: Subject Alternate Name)
  • YourCertName with the Display Name of your Server Certificate

enable ns feature LB CS SSL SSLVPN AAA REWRITE
add server adfs 10.0.0.221
add service adfs_https adfs SSL 443 -gslb NONE -maxClient 0 -maxReq 0 -cip ENABLED X-MS-Forwarded-Client-IP -usip NO -useproxyport YES -sp ON -cltTimeout 180 -svrTimeout 360 -CKA NO -TCPB NO -CMP YES
add lb vserver vip_adfs_https SSL 0.0.0.0 0 -persistenceType NONE -cltTimeout 180
add cs policy adfs -rule "HTTP.REQ.HOSTNAME.SET_TEXT_MODE(IGNORECASE).EQ(\"adfs.domain.com\") && HTTP.REQ.URL.SET_TEXT_MODE(IGNORECASE).CONTAINS(\"/adfs\")"
add rewrite action rewrite_adfs_ProxyHeader insert_http_header X-MS-Proxy "\"NETSCALER\""
add rewrite action rewrite_adfs_Mex replace HTTP.REQ.URL.PATH_AND_QUERY "\"/adfs/services/trust/proxymex\" + HTTP.REQ.URL.SET_TEXT_MODE(IGNORECASE).PATH_AND_QUERY.STRIP_START_CHARS(\"/adfs/services/trust/mex\").HTTP_URL_SAFE"
add rewrite policy rw_pol_adfs_ProxyHeader "http.REQ.URL.TO_LOWER.STARTSWITH(\"/adfs\")" rewrite_adfs_ProxyHeader
add rewrite policy rw_pol_adfs_Mex "http.REQ.URL.TO_LOWER.STARTSWITH(\"/adfs/services/trust/mex\")" rewrite_adfs_Mex
bind lb vserver vip_adfs_https adfs_https
bind lb vserver vip_adfs_https -policyName rw_pol_adfs_ProxyHeader -priority 100 -gotoPriorityExpression NEXT -type REQUEST
bind lb vserver vip_adfs_https -policyName rw_pol_adfs_Mex -priority 110 -gotoPriorityExpression END -type REQUEST
bind cs vserver unified -policyName adfs -targetLBVserver vip_adfs_https -priority 70
add lb monitor mon_adfs_https HTTP-ECV -customHeaders "host: adfs.domain.com\r\n" -send "GET /federationmetadata/2007-06/federationmetadata.xml" -recv "adfs.lauterfresser.de/adfs/services/trust" -LRTM ENABLED -secure YES
bind service adfs_https -monitorName mon_adfs_https
bind ssl vserver vip_adfs_https -certkeyName YourCertName

netscaler_adfs_01

Verify that everything’s working as expected:

netscaler_adfs_04

netscaler_adfs_03

netscaler_adfs_02

Finally, you could navigate to your newly added AD FS URL and check whether AD FS is working properly (see HowTo – Install and Configure Microsoft Active Directory Federation Services 3.0 (ADFS 3.0) as well).

Once again: many thanks, Trond! Awesome work!

Further reading:

Citrix NetScaler v11 – How to setup your NetScaler as an RDS RD Gateway

$
0
0

If you want to use your NetScaler for all things that need to be accessible from the outside, over a single IP address, that poses an issue. As is usually a problem with small to medium sized businesses which only have one public IP address at their disposal, and need to implement features like a fully functional RDS environment (with RD Web Access, RD Gateway, etc), a XenApp/XenDesktop evnironment with StoreFront, and even AD FS, say, for Office365. Generally all these services require port 443 (https) to be fully functional, and you can only set up one distinctive IP address on your NetScaler providing this service, pointing it to your internal resources via Firewall rules, thus leaving you with only one option: NetScaler’s Unified Gateway and Content Switching features. 

In this case keep in mind that we’re not talking about NetScaler’s native RDP Proxy feature as described by Carl Stalhood in his article here. Instead we’re utilizing Content Switching and Unified Gateway features in order to use NetScaler as a frontend for your RDS Gateway and RDWeb, and pass traffic through NetScaler to your internal network, thus allowing you to successfully establish RDP sessions to Published Remote Apps from external networks with NetScaler.

Again, courtesy of Trond Eirik Haavarstein and Dave Brett, without whom this article wouldn’t have been possible in the first place!

This article can be considered a continuation of my previous article Citrix NetScaler v11 – How to setup your NetScaler as an AD FS proxy , and is partly based on requirements and configuration steps described there.

I verified and tested all these settings with Windows Server 2012 R2, a public Server Certificate issued by StartCom, and NetScaler v11.1 48.10nc.

Requirements on the Microsoft side of things

  1. a fully working and functional RD Gateway and RDWeb deployment,
  2. with corresponding Server Certificate in place,
  3. and a secondary IP address and corresponding binding in IIS with SNI enabled (in my case for AD FS and RDWeb, respectively),
  4. adjust my RDPublishedName via Set-RDPublishedName.ps1 script.

Requirements on NetScaler

  1. as well as NetScaler SNI Feature enabled,
  2. RDP Load Balancing vServer (Port 3389),
  3. internal and external DNS Records adjusted accordingly.

In order to successfully get RDS up and running on my existing AD FS server I did the following:

  • added a second IPv4 address to the server to represent each https service seperately, i.e. 10.0.0.221 for AD FS, and 10.0.0.220 for RDS, respectively:
    24-11-_2016_08-24-12
  • enabled IIS SNI support on my Default Web Site by adding corresponding Server Certificates to Site Bindings:
    24-11-_2016_08-31-07 24-11-_2016_08-31-50
  • configured IIS Site Bindings for my Default Web Site to use those IPv4 addresses, i.e. 10.0.0.221 for AD FS, and 10.0.0.220 for RDS, respectively:
    24-11-_2016_08-25-38
  • configured my RDS Deployment Properties to represent the Server Certificate’s FQDN as Server Name and selected the corresponding Server Certificate for its Role Services:
    • RD Connection Broker – Enable Single Sign On
    • RD Connection Broker – Publishing
    • RD Web Access
    • RD Gateway
      24-11-_2016_08-33-24 24-11-_2016_08-34-00
  • adjusted my RDS Server Properties within RD Gateway Manager console to use the corresponding Server Certificate representing my deployment’s public FQDN (SSL Certificate tab):
    24-11-_2016_08-35-45
  • enabled UDP Transport in my RDS Server Properties (Transport Settings tab):
    24-11-_2016_08-48-32
  • and adjusted my RDPublishedName via Set-RDPublishedName.ps1 script:
    24-11-_2016_08-54-51
  • in the end I verified that both my AD FS and RDWeb deployments still worked by navigating to the corresponding URLs:
    • AD FS: https://adfs.domain.com/adfs/fs/federationserverservice.asmx
    • RDWeb: https://rdweb.domain.com/rdweb
      24-11-_2016_09-03-14 24-11-_2016_09-01-28

NetScaler CLI Commands

You have to manually replace the following with your corresponding information:

  • 10.0.0.220 with IP address of your internal RD Gateway server
  • rdweb.domain.com with the FQDN of your external DNS A-Record (read: Subject Alternative Name)
  • YourCertName with the Display Name of your Server Certificate

add server rdgw 10.0.0.220
add serviceGroup svcgrp_rdgw_https SSL -maxClient 0 -maxReq 0 -cip DISABLED -usip NO -useproxyport YES -cltTimeout 180 -svrTimeout 360 -CKA NO -TCPB NO -CMP NO
add lb vserver vip_rdgw_https SSL 0.0.0.0 0 -persistenceType SOURCEIP -timeout 5 -cltTimeout 180
add cs action act_rdgw -targetLBVserver vip_rdgw_https
add cs policy rdgw -rule "HTTP.REQ.HOSTNAME.CONTAINS(\"rdweb.domain.com\")" -action act_rdgw
bind lb vserver vip_rdgw_https svcgrp_rdgw_https
bind cs vserver unified -policyName rdgw -priority 80
bind serviceGroup svcgrp_rdgw_https rdgw 443
set ssl vserver vip_rdgw_https -SNIEnable ENABLED
bind ssl serviceGroup svcgrp_rdgw_https -certkeyName YourCertName
bind ssl vserver vip_rdgw_https -certkeyName YourCertName
save ns config

Furthermore you might have to add the following Content Switching configuration according to Jakob Rutski‘s blog article Load Balancing Remote Desktop Gateway with Citrix NetScaler Part 2:

Name: CSW-RDG-Mobile
Action: CSW-RDG-Action
Expression: HTTP.REQ.HEADER(“User-Agent”).CONTAINS(“MSRPC”)

Verify that everything’s working as expected:

 18-11-_2016_10-48-03

18-11-_2016_10-56-16

18-11-_2016_10-57-24

18-11-_2016_10-58-19

Finally, you could navigate to your newly added RDWeb URL (e.g. https://rdweb.domain.com/RDWeb) and check whether it’s working properly, i.e. you can initiate an RDP session and successfully launch a published RemoteApp:

18-11-_2016_11-01-41

18-11-_2016_11-02-15

Further reading:

Citrix XenDesktop 7.x – Query Citrix Receiver Versions connecting to your environment – XLS Report

$
0
0

Just recently I was tasked to identify all Citrix Receiver Versions connecting to a Citrix XenDesktop 7.x environment.

For starters, to get information on current sessions issue the following PowerShell cmdlets on your Citrix Broker Server:

  1. Add-PSSnapin *Citrix*
  2. Get-BrokerSession | Select MachineName,UserName,ClientPlatform,ClientVersion,*Protocol* | Out-GridView
    14-12-_2016_14-00-00

To get hands on every single information of your current Broker Sessions simply run:

  1. Get-BrokerSession | Out-GridView

Now, in terms of historical session and connection information you have to query the OData API (http://<ServerBrokerFQDN>/Citrix/Monitor/OData/v2/Data), as with the Get-BrokerSession cmdlet you only get information on current sessions. So in case you’re looking for historical reports and data, which you cannot find in the Director Web UI, you could simply create a custom report with Microsoft Excel by connecting to the Data Feed.

This leaves me with recommending the following Citrix Blog Article, that explains how to

  • connect and read the available OData Data Feed from your Citrix Broker Server,
  • read the content of the Connection table and import it into an Excel Sheet,
  • limit the data’s timeframe we’re looking at,
  • add a PivotChart, and
  • filter the required data.

The result might look something like this:

14-12-_2016_14-48-30

You can then tinker with the different tables available through the Data Feed in order to achieve the resultant data set required for your purpose. As opposed to the aforementioned Citrix Blog you could select the following tables to even get information on Citrix Receiver Versions, Client Names, and corresponding User Names:

  • Connection
  • Session
  • User

Just have a look at the underlying SQL DB and its Database Diagram in order to reveal the tables’ relationships:

Relationship NameTable NameTables SpecificationColumns Specifiation
Session_UserSessionsForeign Key ColumnUserId
UsersPrimary Key ColumnId
Connection_SessionForeign Key ColumnSessionKey
Primary Key ColumnSessionKey
Session_CurrentConnectionConnectionsForeign Key ColumnCurrentConnectionId
SessionsPrimary Key ColumnId

14-12-_2016_15-23-07

Then you should be able to rebuild these relationships within Microsoft Excel and get the resultant set of data including corresponding user names:

Otherwise you could create a corresponding View directly within SQL Server Management Studio on the server hosting your XenDesktop SQL Monitoring database. I created one and called it v_ReceiverVersions, thus allowing me to access the data through Excel as well. The custom View includes the aforementioned tables

  • Connection (MonitorData)
  • Session (MonitorData)
  • User (MonitorData)

SELECT MonitorData.Connection.ClientName, MonitorData.Connection.ClientVersion, MonitorData.Connection.BrokeringDate, MonitorData.[User].Upn
FROM MonitorData.Connection INNER JOIN
MonitorData.Session ON MonitorData.Connection.SessionKey = MonitorData.Session.SessionKey AND
MonitorData.Connection.Id = MonitorData.Session.CurrentConnectionId INNER JOIN
MonitorData.[User] ON MonitorData.Session.UserId = MonitorData.[User].Id

This setup allows me to filter the available data (i.e. set to the required period in time by utilizing the BrokeringDate) by either choosing ClientName, ClientVersion or UPN:

The data available in Citrix Director is dependent on your Citrix License, which in turn determines your usage data retention within Citrix Director. As per Citrix:

  • All editions: Director – real-time monitoring and basic troubleshooting (up to 7 days of data)
  • XD7 Platinum: EdgeSight performance management feature – includes #1 + historical monitoring (up to a full year of data through the monitoring SQL database)
  • XD7 Platinum + NetScaler Enterprise: EdgeSight performance management and network analysis – includes #2 plus 60 mins. of network data
  • XD7 Platinum + NetScaler Platinum: EdgeSight performance management and network analysis – includes #2 plus unlimited network data

Further reading:

Viewing all 32 articles
Browse latest View live